IMPORTANT:
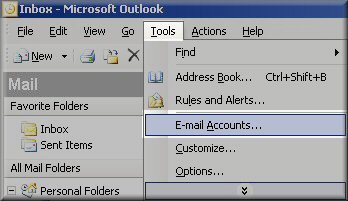
iProperty email account service fees include hosting and management of emails through our dedicated servers. All necessary details required for the account will be provided to the account holder and include password, username, incoming and outgoing mail server. Any additional assistance required for setting up third party software should be directed to the support team for the software provider. Services that can be purchased in addition to the hosting account include a once-off set up fee where a support staff member can guide you through the email set up using Microsoft Office. This is ONLY applicable during the set up of the email account and does not apply to pre-existing email accounts. To begin we will open Microsoft Outlook 2003 & go to "Tools --> Email Accounts"
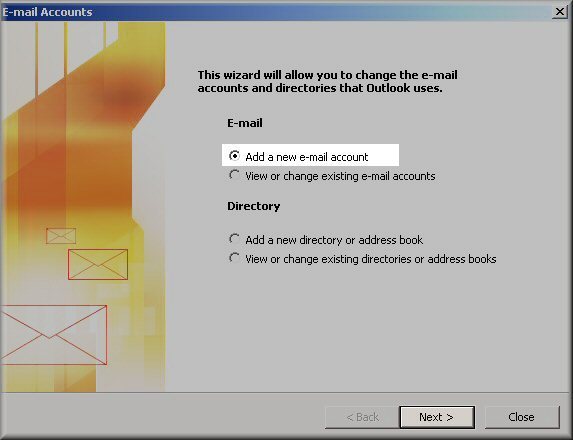
Click Add a new e-mail account and then click Next.
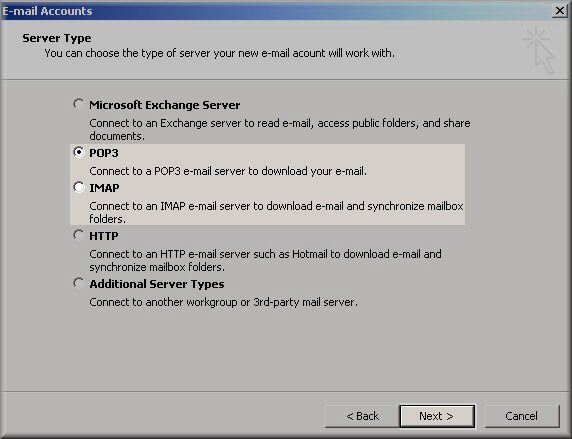
Select POP3 and click Next
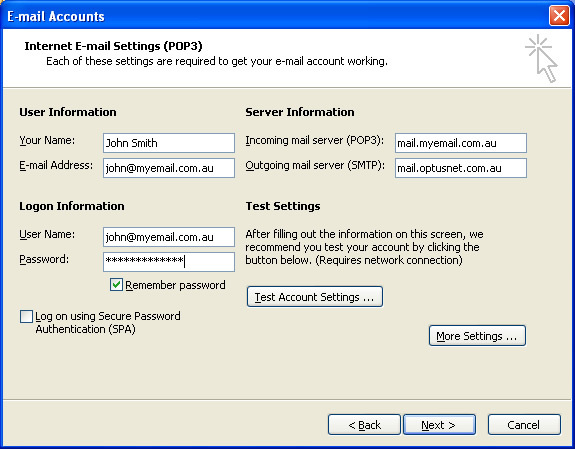
Fill in the following fields
- Enter Your Name as you want it to appear.
- Enter your full email addressusername@youremail.com.au in the Email address: field.
- Enter your username which will be your full email address username@youremail.com.au in the Account Name field.
- Enter your email password in the Password field.
- Enter the mail server details provided to you in the Incoming mail (POP3, IMAP) server field eg mail.yourdomain.com.au
- Enter your ISP mail server details in the Outgoing mail (SMTP) server field.
If you want to be able to access your emails using webmail perform the following steps:
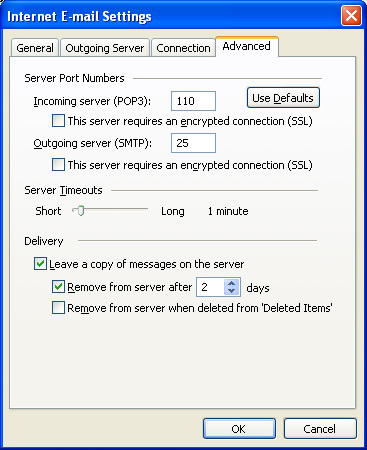
- Click on More Settings
- Click on the Advanced tab.
- Tick the 'Leave a copy of messages on the server' box
- Tick 'Remove from server' and select the number of days: Suggested number: 5-7 *Please note that email accounts only have limited storage space, so leaving messages on the server for too long may result in your mailbox becoming full, and rejecting any new messages* If you receive a 550 error stating that your mailbox has exceeded quota, you can reduce the number of days.
- IMPORTANT: These settings ('Remove from server') must be applied to every device used to receive emails.
- Click on OK.
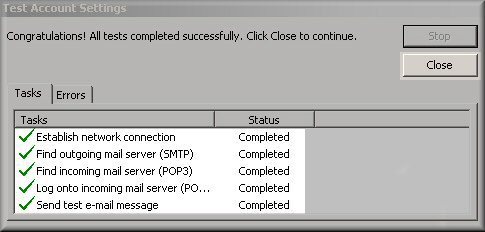
Click the Test Account Settings button and you should see all items with green check marks. Click Close to close the test window.
Click Next, and then finish to save your settings.
See Outgoing Mail Servers for a list of some Australian ISP outgoing mail servers
Comments
0 comments
Article is closed for comments.